Kodi is a versatile, open-source media player designed to function as a digital media hub, providing users with the capability to manage and enjoy their media content across various devices. This free application enables users to play, organize, and even cast their media from a primary device to other devices on the same network. Kodi is widely supported across multiple platforms, including Android, Windows, Linux, iOS, Amazon Fire TV, Apple TV, Xbox, and more. This flexibility makes it an ideal tool for managing media content and streaming services like IPTV.
How to Setup IPTV on Kodi
Getting IPTV channels on Kodi is a straightforward process that starts with downloading and installing the software. Here’s a step-by-step guide to setting up IPTV on Kodi:
Step 1: Download Kodi
Start by downloading the correct version of Kodi for your operating system from the official website here. In this example, we’ll use Windows, but the installation process is similar across different systems.
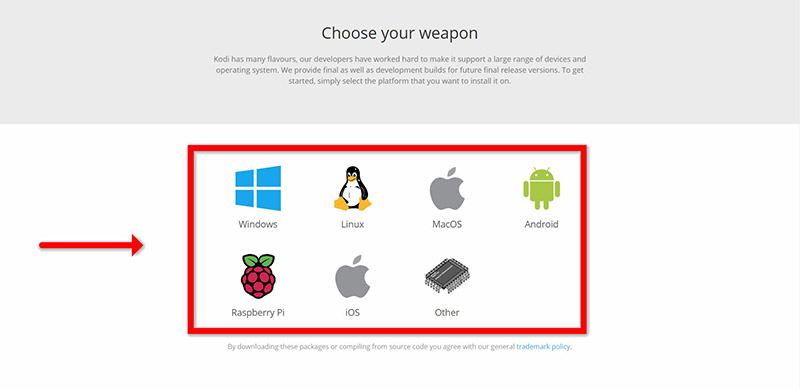
Step 2: Choose 32-Bit or 64-Bit Version
Select the appropriate version for your operating system, either 64-bit or 32-bit, and install Kodi on your device.
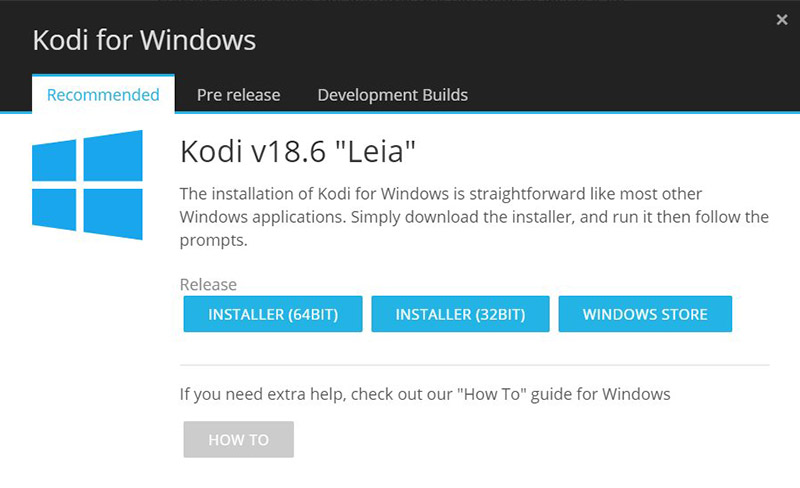
Step 3: Access Add-ons
Once Kodi is installed, open the application and click on the “Add-ons” section. This is where you can enhance the functionality of Kodi by adding various plugins and tools.
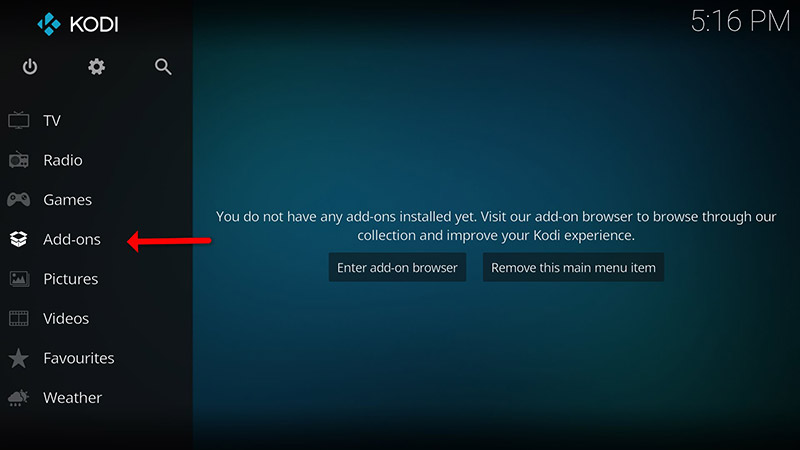
Step 4: Download PVR Clients
Click on “Download” within the Add-ons section, and then select “PVR clients.” This is the key to integrating IPTV with Kodi.
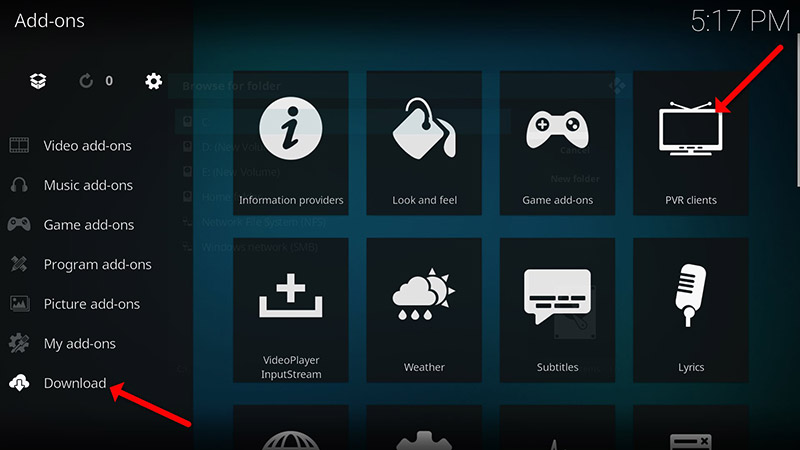
Step 5: Install PVR IPTV Simple Client
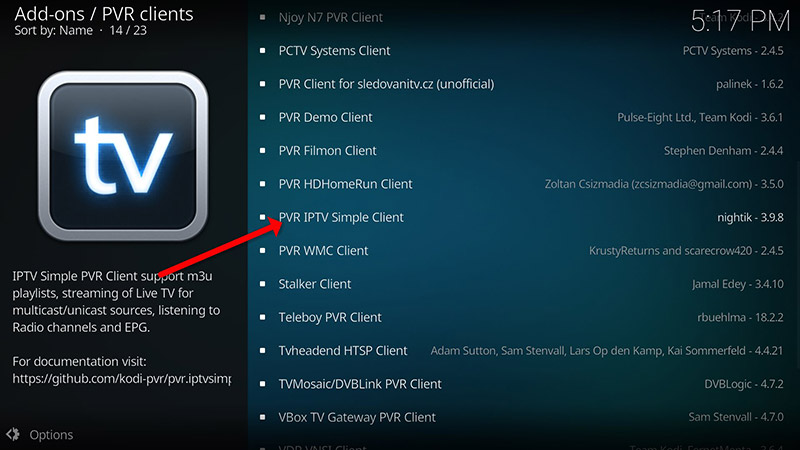
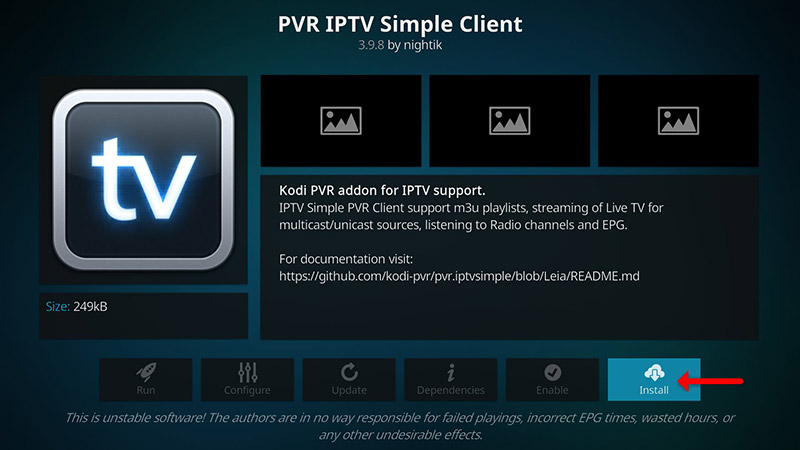
Scroll through the list and select “PVR IPTV Simple Client.” Click on “Install” to download and activate this add-on.
Step 6: Configure the Add-on
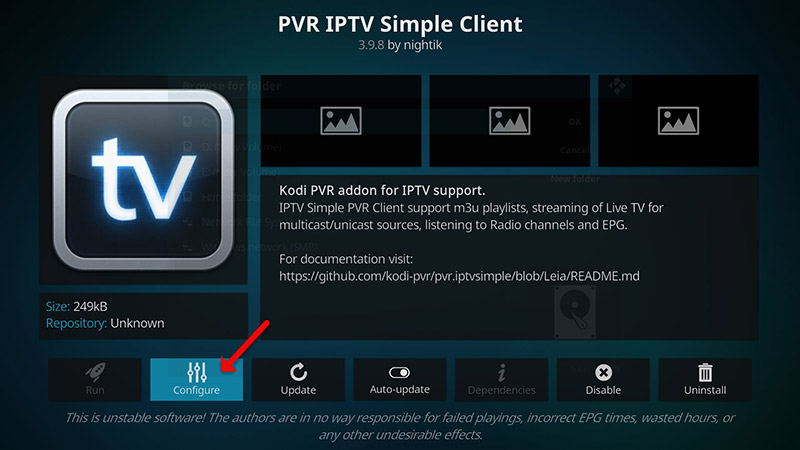
Once the installation is complete, go back to “My add-ons,” navigate to “PVR Clients,” and click on “Configure.” This is where you’ll input the necessary information to connect to your IPTV service.
Step 7: Add M3U Playlist URL
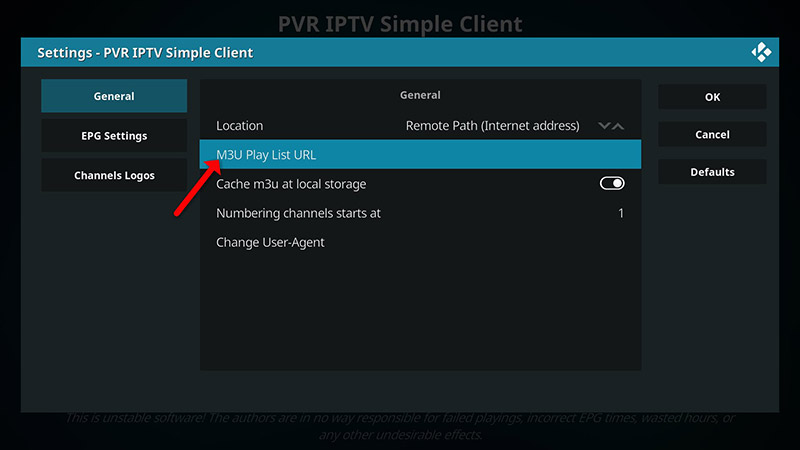
Under the “M3U Play List URL” section, enter the M3U URL provided by your IPTV provider. This link contains the playlist that will load all available IPTV channels.
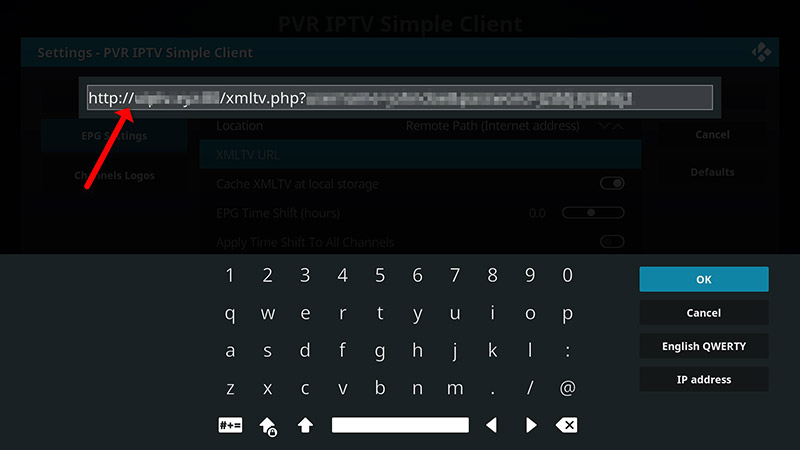
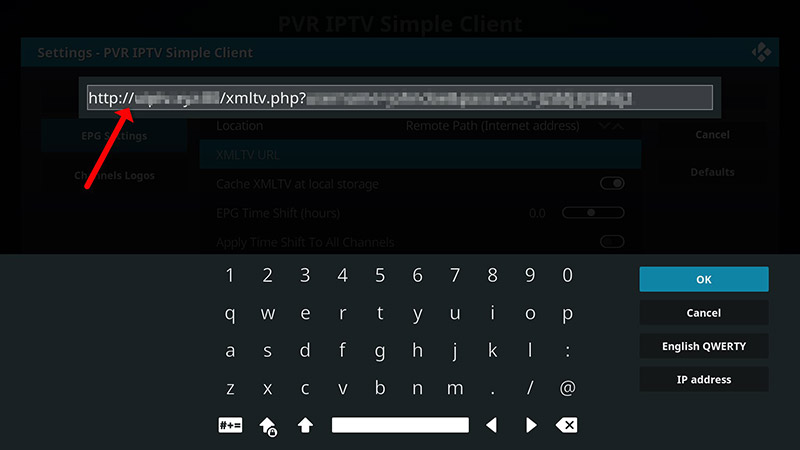
Step 8: Add EPG (Electronic Program Guide)
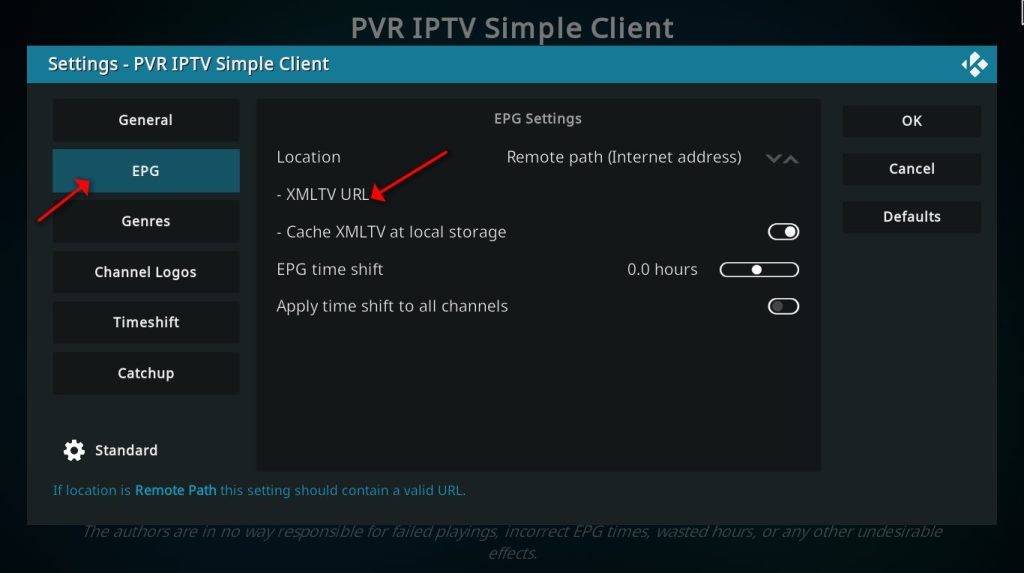
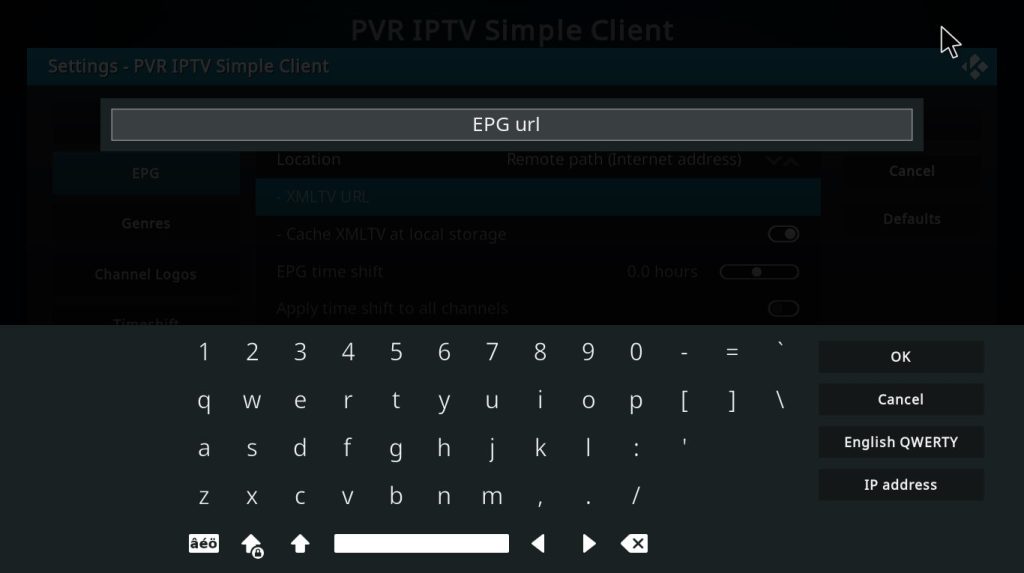
For a more interactive experience, you can add an EPG. Go to the “EPG Settings” tab and paste the XMLTV URL provided by your IPTV service for the program guide.
Step 9: Enable the Add-on
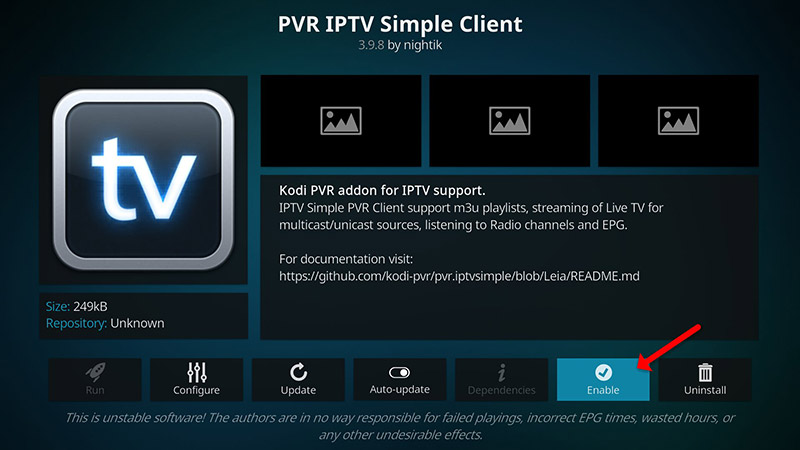
After configuration, click “Enable” to activate the PVR IPTV Simple Client add-on. Once enabled, go back to the main menu.
Step 10: Access IPTV Channels
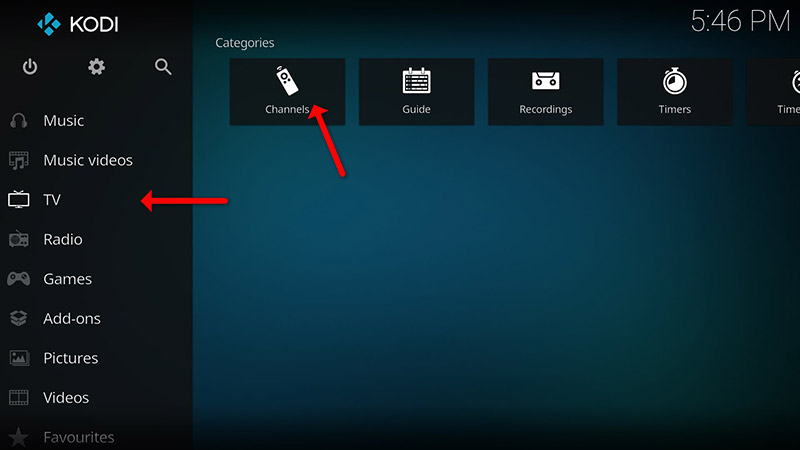
Navigate to the “TV” section and click on “Channels.” Wait for the channels to load, and once completed, you’ll see your IPTV channels ready for streaming.
Understanding MAG Portal for IPTV Streaming
Conclusion
Kodi is not only highly customizable but also packed with features that allow users to enjoy various types of media. Whether you’re streaming local content, using IPTV, or integrating advanced add-ons, Kodi’s user-friendly interface and expansive capabilities make it a solid choice for all your digital media needs. Its ability to adapt to personal preferences with different skins, colors, and add-ons ensures that Kodi remains a top choice for IPTV users worldwide.
Common Issues with MAG Box and How to Fix Them


